Related links
Sunday, April 26, 2020
Saturday, April 25, 2020
How To Unlock Forgot Pattern Password In Android Phone
We've all been there. You accidentally enter the wrong password into your phone too many times, and suddenly, you're locked out of the device for good. Maybe your kid or a friend of yours took your phone and, as a joke or an accident, entered the wrong code one too many times. Maybe it's your secondary phone and it's been sitting in a drawer for a couple months and now you need it – but you forgot the code. With photos of our friends and family, our entire music collection, and our contacts library saved on our devices, one can't just be expected to hard reset the phone if something goes wrong with the passcode on the device.
Being locked out of our phones feels a lot like being locked out of our entire life. That said, you don't have to worry about trying to find a way out from phone purgatory. If you've accidentally triggered a permanent lockout of your phone, or you're not quite there yet but you know you've forgotten the password, you might feel the need to start panicking. Maybe you haven't forgotten the code to your phone, but you're looking for a smarter way to unlock the device when you're using it day-to-day. If you're curious about how phone unlocks work, whether trying to get into your locked device or just trying to make sure you don't accidentally lock yourself out, you've come to the right guide. With any luck, we'll be able to get you back into your phone without losing an ounce of data. And for those users who haven't lost their passcodes but are simply trying to use their phones in a smarter, more secure way, we have some tips for you too. This is how to unlock your Android phone.

Forgotten Passcodes
You've picked up your phone to check your text messages or your email, only to realize that something is wrong with your passcode. Despite knowing that you've set the password to be, let's say, your first child's birthday, nothing seems to be working. Your phone continues to tell you the password is wrong, but you've checked the spelling three times. Finally, your phone alerts you that you've been locked out of the device for the time being. What to do when you need your phone to pay for groceries, call an Uber, or check Instagram while waiting in line at the bank. If you've forgotten your passcode, you aren't completely out of luck just yet.

Try Variations on Your Passcode
Are you entirely sure you aren't misremembering your password? The first piece of advice we would give you is to ensure your passcode isn't being mixed up, or that you aren't forgetting a key piece of your passcode that happens to come at the end of the phrase. Plenty of us often forget about little tweaks to passwords we've added in order to ensure that our devices are as secure as possible. Here are some tips to making sure you're remembering every piece of your passcode:
- Capital letters: If you're using a passcode phrase, you might've forgotten to add in any capital letters to your text. Make sure you remember to place the capital letters correctly as well; we've all forgotten the correct word or letter to capitalize in passcodes like this.
- Numbers: Sometimes you forget about the number you added on your passcode a couple days ago. If your passphrase spells out "WaterInJuly382," you'll want to make sure you remember to enter the "382" part of the password. Don't be surprised if you accidentally forget to add the numbers onto your passcode. It happens to the best of us.
- Special characters: Just like the capital letters, sometimes we add special characters into our passcodes to make them as complex as possible, only to forget the characters just hours later. Think back to decide whether you added an exclamation point, a dollar sign, or any other special character to your code in order to protect your data. It might make the difference between a lost passcode and saving your data.

Find My Mobile (Samsung Devices Only)
Are you using a Galaxy S9 or a Galaxy Note 8? You might be in luck: Samsung's own Find My Mobile tool features an additional feature not offered by Google's own Find My Device tool. Find My Mobile is similar to Find My Device or Find My Phone on iOS, but developed by Samsung specifically for their devices. For the most part, it does the same stuff you'd expect: Find My Mobile can locate your phone using GPS, make the device ring when you lose it in your couch cushions, and can even backup your data remotely using the web app offered by Samsung. More importantly, however, is the app's ability to unlock your device from your computer even if you've forgotten the passcode for the device.

There's a catch: if you haven't set up your Samsung account on your Galaxy S-device, you won't be able to do this. Like most of Samsung's tools, you need a Samsung account to log into the site and to unlock your device. Assuming you have set up your Samsung account—and haven't forgotten the passcode to that account—you should be able to unlock your device using the Find My Mobile web app here. All you need to do is sign in with your Samsung account, select the option to remotely unlock your device, and you'll be all set to go.
It's important to note that unlocking your device remotely does clear the biometric data off your device, so any fingerprints or iris scans you have saved on your device will have to be added back to your phone – small price to pay for saving your device's data in the long run.

As we mentioned, Google has a similar utility for all Android phones called "Find My Device," which only features the option to lock your device, not unlock it. If you've forgotten your passcode, all Find My Device will do is locate the device by GPS, re-lock the screen, and erase data; it won't be able to unlock the screen from the cloud.
Last Resort: Resetting Your Device
Unfortunately, thanks to the security enhancements added to Android 5.0 and above, most modern devices that aren't made by Samsung will have to be reset in order to bypass the password. Yes, this means you'll need to set your phone up again from scratch, re-downloading apps, music, and any other content you have saved on your mobile device. Being locked out of your device makes it difficult to back up any content on your phone, but if you already have some backup methods put in place, you can trigger them by plugging your phone. Both Google Drive backups (Pixel only) and Google Photos backups are often triggered by plugging your phone into a charger, so making sure your device is plugged in is ideal for guaranteeing that your software is saved. We recommend waiting until morning to reset your device if you're locked out; plenty of these backups happen overnight, including most SMS backups if you have an SMS backup app installed and running on your device.
Because you can't access the settings menu to factory reset your phone, you'll need to either use the hardware buttons on your phone to trigger a reset or use Google's Find My Device page in a web browser to reset the phone. Here's how to do each step:

If you're using Google's Find My Device page, load the URL here, sign into your Gmail account, and make sure your phone is selected. On the right side of the display, you'll see a Google Maps layout with a display showing the current location of your phone. On the left side of the display, you'll see a tab with three options: Play Sound, Lock, and Erase. Hit the Erase option to automatically trigger a device reset. Remember that your phone has to be powered on and connected to the internet in order to use this method.

Now, if you don't have access to the phone and can't use Find My Device to restore the phone over the web, you'll need to rely on the second method. To manually erase the device and reset the phone, you'll need to use the hardware buttons to load into your device's recovery system. This is accomplished a little differently on every phone, so your best option is to search for your phone model on Google with the keywords "boot into recovery." Some devices, like Samsung's lineup of phones, are fairly easy to boot into recovery with; you turn off the phone and press and hold a specific button combination to boot into recovery. Other phones, like Google's Pixel 2 XL, are much more finicky, requiring you to press and hold on one key and press and release another at the right time in order to boot into recovery. There are so many various methods for each Android phone, it's basically a requirement to search for the correct method for your phone to do this.

Once you've booted into recovery mode, use your device's volume up and volume down buttons to scroll through the list until you reach "Wipe Data/Factory Reset." Use the power button to select this option, then confirm your selection on the next display. Your phone will begin to reset; make sure the phone is charged enough to ensure it can last at least 30 minutes without dying. Once your phone has rebooted back to the menu screen, you can set up your device by logging back into the Google account you use for your phone. It is vitally important you use the same Google account you used on your phone prior to resetting. Android has a built-in security protocol known as Factory Reset Protection that requires a recently-reset phone to have the same Google account as previously used on the device in order to prevent a thief from immediately using the stolen phone. If you don't have the password for your Google account, you can reset it, but that means you won't be able to log into your phone for 24 hours after the reset.
Backup + Factory Reset
Probably the best combination of things to do does require you plan ahead, and set up a backup of your phone's data to the Google Cloud. This way, even if you have to reset the phone for whatever reason, a reasonably current set of your phone's data will be available, intact, and ready to get your phone back into action. I will walk you through how to set this up. You will need a Google account for this.
To set up backup, follow these steps.
- Go to Settings on your phone.
- Select System->Backup.
- Select Google backup.
- Select "Backup Now"

Your phone will now copy the critical data to your Google account.
Restoring from backup is simple. After you reset your phone and attach your Google account to the phone again, it will automatically restore your data from backup. Running a backup takes only a few minutes on a WiFi connection, or even less if you keep your phone regularly backed up – get into the habit of setting off a backup every night when you go to bed and you will always have a near-realtime backup of your phone.
(Want to backup more than just your phone? You can with one of these speedy 4-TB portable hard drives from Toshiba. You can back up all the computers in your household, and still have room for a thousand movies.)
Unlocking Your Phone with Speed
If you aren't having trouble getting into your phone, but you want to make sure your phone is secure while simultaneously unlocking your phone with some serious speed in order to make your day easier, we have some advice. There are plenty of options for unlocking your device, and they all help to make unlocking your phone easier and to prevent a situation where you forget the code for your phone.

Smart Lock
Smart Lock is one of our favorite tools on Android that is unavailable on other platforms. It makes it easy to make sure your phone is always secure, while simultaneously working to stay out of your way when you want access to your device. Basically, Smart Lock offers Android users several ways to unlock their phones when they're using it, while keeping it locked when it's not near them. To turn on smart lock, you'll need to open up your settings menu on your Android device and head into the Security submenu. Under "Device Security," you'll find an option for Smart Lock. Type in your passcode or password to enter Smart Lock, and you'll be greeted with (as of writing) five unique options for unlocking your phone. Let's break each of these down:

- On-body detection: This setting allows you to unlock your device once before disabling the lock for as long as the phone is in your hand or on your person. Using your smartphone's array of sensors, the device tracks when your device is in use, so you can turn the display off but keep the phone unlocked while it's in your hand. When your phone realizes that it's been set down, your phone will automatically re-lock, requiring a password. This isn't the most secure method Smart Lock offers, but it is pretty cool.

- Trusted places: Sure, it's one thing to keep your phone locked when you're out on the town, but what about when you're sitting in your apartment watching Netflix and you just want to be able to use your phone without constantly worrying about your password? Trusted places works to use the GPS in your phone to detect that you're in a secure location of your choosing, and automatically keeps your phone unlocked for you. As soon as you leave your location, your phone relocks, keeping things safe and secure for you and your device.

- Trusted devices: This might be the best of the five Smart Lock options, because it's ideal for keeping your devices safe when you're nearby and keeping your phone locked when you've left. Do you own a smartwatch, a fitness tracker, a set of wireless headphones, or any other device that syncs over Bluetooth? Trusted devices might be the option for you, allowing you to keep your phone unlocked when your phone is paired with your gadgets. Smartwatches and fitness trackers are ideal for this, but it also helps you keep your phone unlocked when driving in your Bluetooth-equipped car, when running with Bluetooth headphones, or when paired with a set of Bluetooth speakers.

- Trusted face: Plenty of phones have had a face unlock feature, though none of them are quite as secure as the FaceID method on the iPhone X. Still, if you want, you can enable Trusted Face on your device in order to allow your camera to automatically unlock your phone when it recognizes you. However, Trusted Faces is much more easily fooled than the above methods, especially since a photo of you—or even a lookalike—could unlock your phone without having to use any security. Use this one with caution.

- Voice Match: Voice Match is a bit different than the other options on this list, because largely speaking, it's used to activate Google Assistant more than unlock your device. Here's the deal: turning on Voice Match allows you to access your Google Assistant every time you say "OK Google," even while the screen is off. Once you've enabled that ption, you have a second choice: "Unlock with Voice Match," which allows you to automatically unlock your phone when the sound of your voice saying "OK Google" matches the saved voice model on your device.

You can enable just one or all five of these, so don't worry if you like the idea of Trusted Devices but don't want to use On-Body Detection. If Smart Lock makes you feel like you can't properly keep your smartphone secured while enabling these settings, you don't need to worry. Every Android smartphone with Smart Lock enabled has the ability to lock the device manually, requiring a passcode or fingerprint in order to use the device properly. At the bottom of your lock screen is a small lock icon that allows you the choice of manually locking your phone. How you use it is actually a little different depending on your device; for example, Samsung devices have you press the icon to lock the app, but the Pixel phones have you press and hold the icon.

Once you've done this, your phone will give you a small notification alerting you that your device has been manually locked, and that the device will stay locked until you're ready to manually unlock with either your fingerprint (if you've turned this on) or your passcode. Manually locking your phone disables all smart locks, so even if you turn on a trusted Bluetooth device, you'll have to either input your passcode or password, or use your fingerprint to unlock the device if you have biometric security enabled. We'll talk more about fingerprints in the section below, and more specifically, how you can keep your biometric data from being used against you on upcoming versions of Android.
Smart Lock is one of those features that seems like a no-brainer, since it's so damn easy to setup and use to your benefit. That said, using Smart Lock obviously raises security concerns overall, since it does keep your phone unlocked more often. You'll want to play around with Smart Lock to find the right combination of security and ease of use for you. Maybe that means unlocking the device when it's attached to your car's Bluetooth and when you're at home, but keeping it secured at work and leaving on-body detection disabled. Whatever the right combination is for you will likely be a personal decision, but with five different modes of Smart Lock available, you have plenty of options and combinations to choose from.
Fingerprints
Almost every Android device in 2018 has a fingerprint sensor equipped on the body of the device, allowing you to easily access your content without having to go through the hassle of entering your passcode every time you use your phone. Fingerprints aren't a perfect unlocking method, but they're fast, secure, and can be equipped with up to four fingerprint entries on most phones. If you aren't using the fingerprint sensor on your device, you should enable it if only to create a backup option. Even if you prefer to unlock your phone by using an unlock method like a PIN, pattern, or password, fingerprints are perfect if you're ever in danger of accidentally locking the device without knowing the proper password.

If you aren't one to use fingerprints to unlock your phone, one step you could take to ensure you never forget your passcode is set the fingerprint on your phone to unlock with a finger that isn't your thumb or index finger. For example, try using your pinky finger or your ring finger as a way to program a fingerprint without making it obvious. You'll always have the option to use your fingerprint as a backup if you forget your code, but otherwise, you'll be good to go when it comes to always having a way to unlock your phone. You could also try using the fingerprint of someone you intensely trust, like a partner or a child, if only to keep a backup that doesn't happen to be with you all the time. This is especially good if you're worried about being forced to unlock your phone by law enforcement, a pressing matter that is becoming more prevalent all the time.

Finally, if you're still worried about logging your fingerprints on your Android device due to security concerns, the upcoming release of Android P has a security feature built-in that allows you to quickly disable fingerprint scanning if you find yourself at risk of being forced to unlock your device. Called "lockdown" in the settings menu, the option allows you to immediately disable both fingerprints and Smart Lock, just by using the option that appears within the power menu on the lock screen. It only disables those features for one lock, but if you're in a place where you're worried your biometric or smartwatch lock features might be used against you, it's a great option to feel more secure.
Notes and Reminders
If you're the type of person who likes to use a complex password on their phone and balks at the idea of using any of the smart unlock features we highlighted above, you might want to consider using the lock screen text display as a way to leave yourself helpful notes and tips to make remembering your password that much easier. Every Android device on the market today has support for placing a message on the lock screen, and you can display some pretty long messages. While most people use this as a way to label their phone (the example in Android is "Joe's Android"), you can also use it to set what amounts to old password hints from Windows and other desktop operating systems.

So, for example, if you've set your password as the name and birthdate of your daughter (ie., "elizabeth1217"), you could set the reminder on your lock screen as "ebbirth", for "elizabeth1217." This can be done for any password, even if it's a random phrase. "Candy90erring60Blinders," for example, could be hinted at on your lock screen with "Reese's, Jewelry, Sunlight." You'll still have to work to remember the numbers and the correct words that match up with the other content, but it can go a long way in helping you to remember what your password is without giving it away. Again, this is totally optional, a way for users to remember their long passwords without having to deal with giving it away or writing it down.
Password Managers
This final tip is for those among us who have a reputation for forgetting passwords and passcodes. If you're always worried about losing your password to your phone and getting locked out, you might want to try using a password manager like Lastpass or 1Password, which allows you to save all your passwords in one place with a single unlock, typically requiring a fairly long phrase in order to gain access to your passcodes. We recommend Lastpass for password manager beginners, because it's free and works with all your devices out of the box. We recommend writing the passcode down somewhere safe and secure in your house, then saving your phone's password inside of Lastpass for safekeeping. It might seem like an odd choice, and certainly won't speed up the unlocking process if you do manage to forget your password, but it's always good to have a backup unlock method to keep your phone's data safe.

***
Losing access to your phone is a nightmare. It's where all of your personal data, from bank account information to photos of your family and friends, lives and is kept safe. Being locked out of your data can feel like the end of the world, but luckily, it doesn't have to be. Whether you're worried about locking yourself of your account, or you've recently updated your phone's password and want to make sure you don't lose it, there are plenty of options to ensure you don't lose access. And even if you have, you aren't completely out of luck, thanks to the various options that exist for getting back into your account.
If you're looking for a way to unlock your phone faster, there's all sorts of opportunities to make sure your Android device is ready for you to login without having to enter your password every time. Biometric security has become fairly commonplace in the mobile arena, and likewise, Smart Lock on Android has made it easy to keep your device secure when it needs to be and unlocked when it doesn't. Overall, the security options on Android have become so plentiful that there's no reason not to keep some kind of security on your Android device. Just make sure you remember the password before you save the account information.
@EVERYTHING NT
Related word
Friday, April 24, 2020
Scanning For Padding Oracles
As you might have heard, we recently got our paper on padding oracle attacks accepted to the USENIX Security Conference. In this paper, we describe and evaluate a scanning methodology with which we found several padding oracle vulnerabilities in devices from various vendors. In total, we found that 1.83% of the Alexa Top 1 Million have padding oracle vulnerabilities.
To test whether a server is vulnerable, we specified different padding oracle vectors which we send to the system under test, using different cipher suites and protocol versions. If the server does not behave identically (on both the TLS and TCP layers), we consider it to be vulnerable to a padding oracle attack, since it is leaking information about the plaintext via behavior differences. Depending on the responses to such padding oracle vectors, one can estimate which implementation is responsible for the vulnerability. We contacted quite a few website owners and tried to cooperate with them, to find out which vendors and TLS stacks are responsible for the identified vulnerabilities. You can find our current disclosure status on this issue on https://github.com/RUB-NDS/TLS-Padding-Oracles.
We are currently in contact with other vendors to fix the remaining vulnerabilities, but the some of the rare (in terms of the number of affected hosts) vulnerabilities are currently not attributed. To fix the remaining vulnerabilities, we ask for your assistance to help get rid of this issue. For this purpose, we integrated a standalone version of our padding oracle evaluation tool into our TLS-Scanner (v.2.7) project. This tool allows you (among other things) to evaluate if a specific server is vulnerable.
When the tool detects a vulnerability, it tries to attribute the vulnerability to a specific vendor or CVE. If we already know of the vulnerability of the server you scanned, the tool will print its details. If the tool does not have a description of the vulnerability in its database, it will ask you to notify us about the vulnerable server, such that we can notify the vendor and get the device fixed. To be clear: the tool never sends any data to us - you have the choice of whether to notify us (and what details to include). There is a chance that the tool's attribution is also mistaken, that is, the tool lists a vendor for your host, but you know for sure that you do not use an implementation by this vendor. Please contact us in such cases as well.
You will need to get TLS-Attacker 2.9 (if you do not already have it):
Now we can clone and install the TLS-Scanner
If you start the TLS-Scanner you should be greeted by a usage info, similar to the one below:
or
This should give you an overview of the supported command line flags. The only really required one is the -connect flag (similar to OpenSSL and TLS-Attacker), with which you specify which host to scan. The most basic command is therefore:
Your output may look something like this:
By default, TLS-Scanner will run single-threaded. In such cases the scanning will take a while; just how long it will take depends on your server configuration. The scanner also supports multi-threading, which drastically improves the performance. There are two parameters to play around with, -threads, which controls how many different "probes" are executed in parallel, and -aggressive , which controls how many handshakes can be executed simultaneously. If you want the fastest results the following parameters are usually a good choice:
But lets get back to the results of the Scanner. Currently the Scanner supports a bunch of well known tests, like supported ciphersuites or protocol versions. These are very similar to what you may be used to from other scanners like ssllabs or testssl.sh.
This section lists the responses of the scanned host for each padding oracle vector, for each cipher suite and protocol version. For hackmanit.de, there is no detected difference in responses, which means hackmanit.de is not vulnerable to the attack:
If we want, we can also look at the concrete responses of the server. For this purpose, we start the scanner with the -reportDetail flag:
With this flag we now get the following details:
So what does this all mean? First of all, we named our malformed records. The interpretation of those names is visualized in the following table:
Next to the name you can see what the actual response from the server was. Alert messages which are in [] brackets indicate that the alert was a fatal alert while () brackets indicate a warning alert. ENC means that the messages were encrypted (which is not always the case). The last symbol in each line indicates the state of the socket. An X represents a closed socket with a TCP FIN, a T indicates that the socket was still open at the time of measurement and an @ indicates that the socket was closed with an RST. So how did Hackmanit respond? We see a [BAD_RECORD_MAC] ENC X, which means we received an ENCrypted FATAL BAD_RECORD_MAC alert, and the TCP connection was closed with a TCP FIN. If a server appears to be vulnerable, the scanner will execute the scan a total of three times to confirm the vulnerability. Since this response is identical to all our vectors, we know that the server was not vulnerable and the scanner is not re-executing the workflows.
Here is an example of a vulnerable host:
As you can see, this time the workflows got executed multiple times, and the scanner reports the cipher suite and version as vulnerable because of "SOCKET_STATE". This means that in some cases the socket state revealed information about the plaintext. If you look closely, you can see that for ValPadInvMac-[0]-0-59, ValPadInvMac-[8]-0-59 and ValPadInvMac-[15]-0-59 the server failed to close the TCP socket, while for all other vectors the TCP connect was closed with a TCP FIN. The server was therefore vulnerable.
Since the server was vulnerable, TLS-Scanner will also print an additional section: "PaddingOracle Details"
In this section we try to identify the vulnerability. In the example above, TLS-Scanner will print the following:
As you can see, we attribute this vulnerability to OpenSSL <1.0.2r. We do so by looking at the exact responses to our malformed records. We additionally print two important facts about the vulnerability: Whether it is observable and its strength. The precise details of these properties are beyond the scope of this blogpost, but the short version is:
If an oracle is observable, a man in the middle attacker can see the differences between the vectors by passively observing the traffic, without relying on browser or application specific tricks. A strong oracle has no limitations in the number of consecutive bytes an attacker can decrypt. If an oracle is STRONG and OBSERVABLE, then an attacker can realistically exploit it. This is the case in the example above.
For more details on this, you will have to wait for the paper.
Could not identify the vulnerability. Please contact us if you know which software/hardware is generating this behavior.
If you encounter this message, we do not know yet who is responsible for this padding oracle and would be happy to know which device/vendor is responsible. If you know who is, please contact us so that we can get in contact with the vendor to fix the issue. To reiterate, the tool never sends any data back to us, and it is your choice whether to contact us manually or not.
There are also some cases in which we can identify the vendor, but the vendor has not patched the vulnerability yet. If you encounter such a host, the scanner will tell you that we know the responsible vendor. To prevent abuse, we do not include further details.
A notable feature of our scanner is that we do not actively try to avoid intolerances (like not scanning with a lot of cipher suites in the Hello messages etc.). We believe that doing so would hide important bugs. We are currently experimenting with intolerances checks, but the feature is now still in beta. If we cannot scan a server (most of the time due to intolerances or SNI problems), the scanner will report a lot of intolerances and usually no supported protocol versions. Some intolerances may trick the scanner into reporting false results. At the current stage, we cannot make any guarantees. If you are using this tool during a pentest, it might be smart to rescan with other scanners (like the recently released padcheck tool from our colleague Craig Young) to find the ground truth (this is good advice in general, since other mainstream scanners likely have the same issues). Note however that it is very unlikely that the scanner reports a false positive on a padding oracle scan.
To test whether a server is vulnerable, we specified different padding oracle vectors which we send to the system under test, using different cipher suites and protocol versions. If the server does not behave identically (on both the TLS and TCP layers), we consider it to be vulnerable to a padding oracle attack, since it is leaking information about the plaintext via behavior differences. Depending on the responses to such padding oracle vectors, one can estimate which implementation is responsible for the vulnerability. We contacted quite a few website owners and tried to cooperate with them, to find out which vendors and TLS stacks are responsible for the identified vulnerabilities. You can find our current disclosure status on this issue on https://github.com/RUB-NDS/TLS-Padding-Oracles.
We are currently in contact with other vendors to fix the remaining vulnerabilities, but the some of the rare (in terms of the number of affected hosts) vulnerabilities are currently not attributed. To fix the remaining vulnerabilities, we ask for your assistance to help get rid of this issue. For this purpose, we integrated a standalone version of our padding oracle evaluation tool into our TLS-Scanner (v.2.7) project. This tool allows you (among other things) to evaluate if a specific server is vulnerable.
When the tool detects a vulnerability, it tries to attribute the vulnerability to a specific vendor or CVE. If we already know of the vulnerability of the server you scanned, the tool will print its details. If the tool does not have a description of the vulnerability in its database, it will ask you to notify us about the vulnerable server, such that we can notify the vendor and get the device fixed. To be clear: the tool never sends any data to us - you have the choice of whether to notify us (and what details to include). There is a chance that the tool's attribution is also mistaken, that is, the tool lists a vendor for your host, but you know for sure that you do not use an implementation by this vendor. Please contact us in such cases as well.
How to use the Tool
First, you need to grab hold of the tool. There are 3 ways to get your hands dirty: pre-compiled, self-compiled or Docker. We provide a pre-compiled version of the tool since the compilation process can get quite messy if you are not familiar with java and maven. You can directly download the resulting project here. However, if you also want to play around with the code, you have to compile everything yourself.Building the TLS-Scanner
For this, you will need (Git), maven (sudo apt-get install maven), OpenJDK-8 (I can guarantee that this version works, other versions might work as well, have not tested it).You will need to get TLS-Attacker 2.9 (if you do not already have it):
Now we can clone and install the TLS-Scanner
Docker
We also provide a Dockerfile, which lets you run the scanner directlyGetting Started
If you start the TLS-Scanner you should be greeted by a usage info, similar to the one below:
or
This should give you an overview of the supported command line flags. The only really required one is the -connect flag (similar to OpenSSL and TLS-Attacker), with which you specify which host to scan. The most basic command is therefore:
Your output may look something like this:
By default, TLS-Scanner will run single-threaded. In such cases the scanning will take a while; just how long it will take depends on your server configuration. The scanner also supports multi-threading, which drastically improves the performance. There are two parameters to play around with, -threads, which controls how many different "probes" are executed in parallel, and -aggressive , which controls how many handshakes can be executed simultaneously. If you want the fastest results the following parameters are usually a good choice:
But lets get back to the results of the Scanner. Currently the Scanner supports a bunch of well known tests, like supported ciphersuites or protocol versions. These are very similar to what you may be used to from other scanners like ssllabs or testssl.sh.
Padding Oracles
The main advantage of our scanner is the ability to scan for padding oracle vulnerabilities (which is probably why you are reading this post). You will see if you are vulnerable in the "Attack Vulnerabilities" section. For example, when scanning hackmanit.de, the result is false. Good for us! But as you might have seen there is also another section in the scanner report:"PaddingOracle Responsemap"This section lists the responses of the scanned host for each padding oracle vector, for each cipher suite and protocol version. For hackmanit.de, there is no detected difference in responses, which means hackmanit.de is not vulnerable to the attack:
If we want, we can also look at the concrete responses of the server. For this purpose, we start the scanner with the -reportDetail flag:
With this flag we now get the following details:
So what does this all mean? First of all, we named our malformed records. The interpretation of those names is visualized in the following table:
| BasicMac-<position>-<XOR> | A Record with ApplicationData, MAC and padding bytes, where the padding byte at <position> is XOR'd <XOR> |
| MissingMacByteFirst | A Record without ApplicationData, where the first byte of the MAC is missing |
| MissingMacByteLast | A Record without ApplicationData, where the last byte of the MAC is missing |
| Plain FF | A Record without ApplicationData & MAC which only contains Paddingbytes: 64* 0xFF |
| Plain 3F | A Record without ApplicationData & MAC which only contains Paddingbytes: 64* 0xF3 |
| InvPadValMac-[<position>]-<appDataLength>-<paddingBytes> | A Record with invalid padding and valid MAC. The Record contains <appDataLength> many ApplicationData bytes and <paddingBytes> many PaddingBytes. The Padding is invalid at <position>. |
| ValPadInvMac-[<position>]-<appDataLength>-<paddingBytes> | A Record with valid padding and invalid MAC. The Record contains <appDataLength> many ApplicationData bytes and <paddingBytes> many PaddingBytes. The MAC is invalid at <position>. |
| InvPadInvMac-[<position>]-<appDataLength>-<paddingBytes> | A Record with invalid padding and invalid MAC. The Record contains <appDataLength> many ApplicationData bytes and <paddingBytes> many PaddingBytes. The MAC is invalid at the first position. The Padding is invalid at <position>. |
Next to the name you can see what the actual response from the server was. Alert messages which are in [] brackets indicate that the alert was a fatal alert while () brackets indicate a warning alert. ENC means that the messages were encrypted (which is not always the case). The last symbol in each line indicates the state of the socket. An X represents a closed socket with a TCP FIN, a T indicates that the socket was still open at the time of measurement and an @ indicates that the socket was closed with an RST. So how did Hackmanit respond? We see a [BAD_RECORD_MAC] ENC X, which means we received an ENCrypted FATAL BAD_RECORD_MAC alert, and the TCP connection was closed with a TCP FIN. If a server appears to be vulnerable, the scanner will execute the scan a total of three times to confirm the vulnerability. Since this response is identical to all our vectors, we know that the server was not vulnerable and the scanner is not re-executing the workflows.
Here is an example of a vulnerable host:
As you can see, this time the workflows got executed multiple times, and the scanner reports the cipher suite and version as vulnerable because of "SOCKET_STATE". This means that in some cases the socket state revealed information about the plaintext. If you look closely, you can see that for ValPadInvMac-[0]-0-59, ValPadInvMac-[8]-0-59 and ValPadInvMac-[15]-0-59 the server failed to close the TCP socket, while for all other vectors the TCP connect was closed with a TCP FIN. The server was therefore vulnerable.
Since the server was vulnerable, TLS-Scanner will also print an additional section: "PaddingOracle Details"
In this section we try to identify the vulnerability. In the example above, TLS-Scanner will print the following:
As you can see, we attribute this vulnerability to OpenSSL <1.0.2r. We do so by looking at the exact responses to our malformed records. We additionally print two important facts about the vulnerability: Whether it is observable and its strength. The precise details of these properties are beyond the scope of this blogpost, but the short version is:
If an oracle is observable, a man in the middle attacker can see the differences between the vectors by passively observing the traffic, without relying on browser or application specific tricks. A strong oracle has no limitations in the number of consecutive bytes an attacker can decrypt. If an oracle is STRONG and OBSERVABLE, then an attacker can realistically exploit it. This is the case in the example above.
For more details on this, you will have to wait for the paper.
Attribution
As you can see, we try to fingerprint the responsible device/implementation. However, we were not able to identify all vulnerable implementations yet. If we cannot attribute a vulnerability you will receive the following message:Could not identify the vulnerability. Please contact us if you know which software/hardware is generating this behavior.
If you encounter this message, we do not know yet who is responsible for this padding oracle and would be happy to know which device/vendor is responsible. If you know who is, please contact us so that we can get in contact with the vendor to fix the issue. To reiterate, the tool never sends any data back to us, and it is your choice whether to contact us manually or not.
There are also some cases in which we can identify the vendor, but the vendor has not patched the vulnerability yet. If you encounter such a host, the scanner will tell you that we know the responsible vendor. To prevent abuse, we do not include further details.
Non-Determinism and Errors
In some cases, the scanner is unable to scan for padding oracles and reports ERROR or non-deterministic responses. The ERROR cases appear if the scanner failed could not handshake with the specified cipher suite and protocol version. This might be due to a bug in the tested TLS-Server or a bug in TLS-Attacker or TLS-Scanner. If you think the handshake fails because of an issue on our side, please open an issue on Github, and we will investigate. The more interesting cases are the non-deterministic ones. In such cases the scanner observed non-identical scan results in three separate scans. This can be due to non-determinism in the software, connection errors, server load or non-homogeneous load balancing. Currently, you will have to analyze these cases manually. In the paper, we excluded such hosts from our study because we did not want to artificially improve our results. But we understand that you as a tester want to know if the server is vulnerable or not. If the server is not truly vulnerable you would see the differences between the answers spread across all the different vectors. If the differences only appear on a subset of malformed records the server is very likely vulnerable. If you are unsure, you can also always scan multiple times (or scan slowly), increase the timeout, or if you are entirely lost get in touch with us.How YOU can help
Please use the scanner on all your hosts and check for padding oracle vulnerabilities. If the scanner can identify your vulnerability, a patch should already be available. Please patch your system! If the scanner does not identify the vulnerability (and instructs you to contact us), please contact us with the details (robert.merget@rub.de). If you can provide us with the detailed output of the scanner or even better, the name of the host, with the corresponding vendor, we could match the results with our database and help fix the issue. We can already attribute over 90% of the vulnerabilities, but there is still a lot to be discovered. We mostly scanned the Alexa top 1-million on port 443. Other protocols like IMAPS, POP3S, etc. might have different implementations with different vulnerabilities. If you find vulnerabilities with our tool, please give us credit. It helps us to get more funding for our project.Issues with the Scanner
A notable feature of our scanner is that we do not actively try to avoid intolerances (like not scanning with a lot of cipher suites in the Hello messages etc.). We believe that doing so would hide important bugs. We are currently experimenting with intolerances checks, but the feature is now still in beta. If we cannot scan a server (most of the time due to intolerances or SNI problems), the scanner will report a lot of intolerances and usually no supported protocol versions. Some intolerances may trick the scanner into reporting false results. At the current stage, we cannot make any guarantees. If you are using this tool during a pentest, it might be smart to rescan with other scanners (like the recently released padcheck tool from our colleague Craig Young) to find the ground truth (this is good advice in general, since other mainstream scanners likely have the same issues). Note however that it is very unlikely that the scanner reports a false positive on a padding oracle scan.
Conclusion
There are still a lot of padding oracle vulnerabilities out there - and a lot of them are still unpatched. We hope you will find some bugs with the tool :) Happy H4cking :DAcknowlegements
This is joint work from Robert Merget (@ic0nz1), Juraj Somorovsky (@jurajsomorovsky), Nimrod Aviram (@NimrodAviram), Janis Fliegenschmidt (@JanisFliegens), Craig Young (@craigtweets), Jörg Schwenk (@JoergSchwenk) and (Yuval Shavitt).More information
Thursday, April 23, 2020
HACKING PASSWORDS USING CREDENTIAL HARVESTER ATTACK
Everything over the internet is secured by the passwords. You need a login to do any stuff on any social or banking website. Passwords are the first security measure for these type of websites. So, I brought a tutorial on how to hack such sort of login passwords. This tutorial is based on credential harvester attack method. In which you will know about hacking passwords using credential harvester attack method.
HACKING PASSWORDS USING CREDENTIAL HARVESTER ATTACK
REQUIREMENTS
It's very simple and easy to follow. Before you start, you need the following things to work with.
- Kali Linux OS
- Target Website
STEPS TO FOLLOW
- Run the Kali Linux machine. If you have not Kali Linux installed, you can grab a free copy and install it as a virtual machine. You can learn more about Kali Linux VirtualBox installation.
- Sign in to Kali Linux by entering username root and password toor.
- As you'll sign in, navigate to the Applications > Social Engineering Tools > Social Engineering as shown in the following screenshot.
- Now you will see the different options. You have to choose Social Engineering Attacks by simply entering its number in the terminal. Once you do it, it will show a few options further. Simply choose Website Vector Attack by putting its number.
- Website vector attack will show up it's a different type of attacks. We are going to use Credential Harvester Attack.
- Choose the Site Clone option. As you do it, it will ask for your public IP address. Just open up a new terminal and type ifconfig. It'll show the public IP. Just copy it and paste in the previous terminal as shown in the following screenshots.
- After we do it. Enter the target website of which passwords you want to hack. Make sure to use a website that has username and password on the same page.
- All done now. As someone opens up the browser on the public IP we specified, it'll show up the website that we entered in the previous step. Now as someone enters their username or password, it will be captured in the terminal.
That's all. If you're not clear yet. You can watch the following complete video tutorial on how to do it.
Related links
Wednesday, April 22, 2020
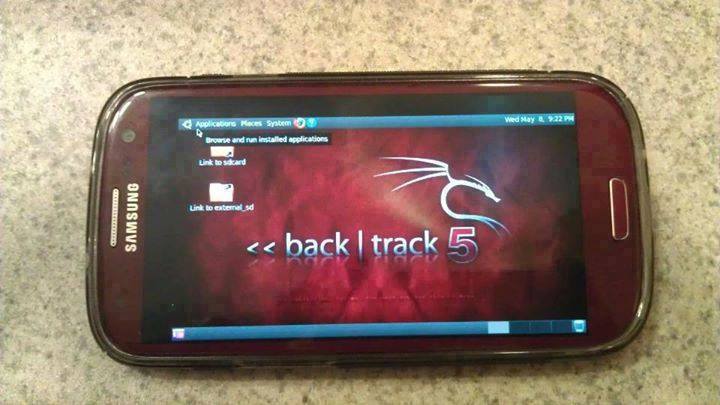
How To Install And Run Backtrack On Android
Guide you step by step to How to install and run Backtrack on android. As the Backtrack is also available with ARM architecture which makes it possible to run Backtrack on an ARM machine such as mobiles or tablets.
Recently, We are discussed Install and Run BackTrack on Windows. Android is the best OS for penetration testing. It designed for digital forensics and penetration testing or hacking tool. It comes with many more updated tools. As the Backtrack is also available with ARM architecture which makes it possible to run Backtrack on an ARM machine such as mobiles or tablets.
How To Install and Run Backtrack On AndroidRequirements
- A Rooted Device [ Root Simple Android Phone Without Pc ]
- Backtrack ARM [ Download ]
- BusyBox [ Download ]
- Android Terminal and Android VNC
- If you are using PC then you need 7zip for extraction otherwise you can use zarchiver on your android phone. [ Download ]
Step to Install and Run Backtrack On Android:
First of all extract the BT5-GNOME-ARM.7z. and copy the "BT5" folder and then put in your phone's root directory. Here mine phone is /sdcard. The root directory is different for different mobile devices.
- Now install all the above apps Busybox, Android Terminal, Android Vnc.
- After installing BusyBox application open it and wait until it finishes loading and then click on Smart install.
- Now open the android terminal and type the following command:
su cd /sdcard/BT5sh bootbtNOTE :- When you type su in terminal it will ask you for superuser request and you have to tap on Grant. - After this, type the following commands in terminal.
export USER=rootvncpasswd - After entering vncpasswd the terminal will ask you to enter the password. Enter the desired password and hit enter.
- Now type the following commands.
tightvncserver -geometry 1280×720 - The terminal emulator will create the localhost to connect it to VNC server. Now note the localhost port marked red below. Now minimize the terminal emulator.
- Open the Android VNC and type the following settings.
Nickname : BT5
Password : your password here which you entered in terminal (step no.6)
Address : localhost
Port : 5906
Password : your password here which you entered in terminal (step no.6)
Address : localhost
Port : 5906
NOTE: Make sure that your localhost's port matches with terminal's localhost. Here mine New 'X' desktop is localhost:6. You may be different. So, in VNC type Port 590X where the "X" is the localhost in the android terminal.
That's it now just tap on connect to run the Backtrack on your android. So in this way you successfully install and run backtrack 5 on android. If you face any problem feel free to discuss in below comments!
Read more
DSploit
DSploit
After playing with the applications installed on the Pwn Pad, I found that the most important application (at least for me) was missing from the pre-installed apps. Namely, DSploit. Although DSploit has tons of features, I really liked the multiprotocol password sniffing (same as dsniff) and the session hijacking functionality.
The DSploit APK in the Play Store was not working for me, but the latest nightly on http://dsploit.net worked like a charm.
Most features require that you and your target uses the same WiFi network, and that's it. It can be Open, WEP, WPA/WPA2 Personal. On all of these networks, DSploit will sniff the passwords - because of the active attacks. E.g. a lot of email clients still use IMAP with clear text passwords, or some webmails, etc.
First, DSploit lists the AP and the known devices on the network. In this case, I chose one victim client.

In the following submenu, there are tons of options, but the best features are in the MITM section.

Stealthiness warning: in some cases, I received the following popup on the victim Windows:

This is what we have under the MITM submenu:

Password sniffing
For example, let's start with the Password Sniffer. It is the same as EvilAP and DSniff in my previous post. With the same results for the popular Hungarian webmail with the default secure login checkbox turned off. Don't forget, this is not an Open WiFi network, but one with WPA2 protection!

Session hijack
Now let's assume that the victim is very security-aware and he checks the secure login checkbox. Another cause can be that the victim already logged in, long before we started to attack. The session hijacking function is similar to the Firesheep tool, but it works with every website where the session cookies are sent in clear text, and there is no need for any additional support.
In a session hijacking attack (also called "sidejacking"), after the victim browser sends the authentication cookies in clear text, DSploit copies these cookies into its own browser, and opens the website with the same cookies, which results in successful login most of the time. Let's see session hijacking in action!
Here, we can see that the session cookies have been sniffed from the air:

Let's select that session, and be amazed that we logged into the user's webmail session.


Redirect traffic
This feature can be used both for fun or profit. For fun, you can redirect all the victim traffic to http://www.kittenwar.com/. For-profit, you can redirect your victim to phishing pages.
Replace images, videos
I think this is just for fun here. Endless Rick Rolling possibilities.
Script injection
This is mostly for profit. client-side injection, drive-by-exploits, endless possibilities.Custom filter
If you are familiar with ettercap, this has similar functionalities (but dumber), with string or regex replacements. E.g. you can replace the news, stock prices, which pizza the victim ordered, etc. If you know more fun stuff here, please leave a comment (only HTTP scenario - e.g. attacking Facebook won't work).Additional fun (not in DSploit) - SSLStrip
From the MITM section of DSploit, I really miss the SSLStrip functionality. Luckily, it is built into the Pwn Pad. With the help of SSLStrip, we can remove the references to HTTPS links in the clear text HTTP traffic, and replace those with HTTP. So even if the user checks the secure login checkbox at freemail.hu, the password will be sent in clear text - thus it can be sniffed with DSniff.HTML source on the client-side without SSLstrip:

HTML source on the client-side with SSL strip:

With EvilAP, SSLStrip, and DSniff, the password can be stolen. No hacking skillz needed.
Lessons learned here
If you are a website operator where you allow your users to login, always:- Use HTTPS with a trusted certificate, and redirect all unencrypted traffic to HTTPS ASAP
- Mark the session cookies with the secure flag
- Use HSTS to prevent SSLStrip attacks
If you are a user:
- Don't trust sites with your confidential data if the above points are not fixed. Choose a more secure alternative
- Use HTTPS everywhere plugin
- For improved security, use VPN
Because hacking has never been so easy before.
And last but not least, if you like the DSploit project, don't forget to donate them!
And last but not least, if you like the DSploit project, don't forget to donate them!
More articles
Subscribe to:
Comments (Atom)
